注:本文主要参考该文章。
1 安装并设置zsh
安装命令:
1 | sudo apt install zsh |
设置zsh为默认shell:
1 | chsh -s $(which zsh) |
2 安装Oh My Zsh
安装命令:
1 | sh -c "$(curl -fsSL https://raw.githubusercontent.com/ohmyzsh/ohmyzsh/master/tools/install.sh)" |
3 安装主题PowerLevel10k
安装命令:
1 | git clone https://github.com/romkatv/powerlevel10k.git $ZSH_CUSTOM/themes/powerlevel10k |
进入.zshrc设置主题:
1 | ZSH_THEME="powerlevel10k/powerlevel10k" |
4 安装插件
4.1 日常插件
zsh-autosuggestions:
1 | git clone https://github.com/zsh-users/zsh-autosuggestions ${ZSH_CUSTOM:-~/.oh-my-zsh/custom}/plugins/zsh-autosuggestions |
zsh-syntax-highlighting:
1 | git clone https://github.com/zsh-users/zsh-syntax-highlighting.git ${ZSH_CUSTOM:-~/.oh-my-zsh/custom}/plugins/zsh-syntax-highlighting |
设置要启动的插件(Plugins):
1 | plugins=( |
值得注意的是,除了zsh-autosuggestions 与zsh-syntax-highlighting 需要单独安装外,上述的其他插件均是内嵌的,可直接添加至配置文件中直接使用。
4.2 Tmux设置
该部分主要参考文章。
安装命令:
1 | sudo apt-get install tmux |
tmux 的个性化设置需在主目录编辑.tmux.conf 文件,本人的文件设置如下:
1 | set -g prefix C-z |
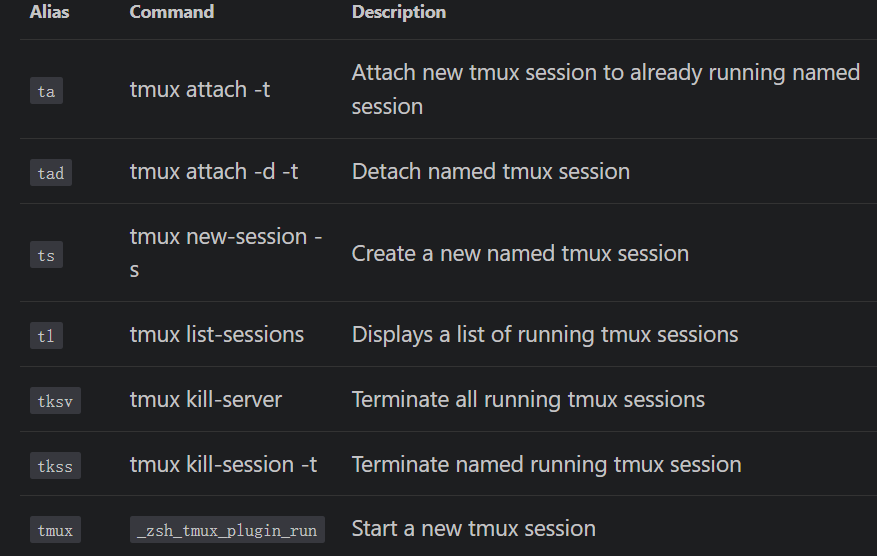
其他使用说明可参考上述链接。在oh my zsh 插件中添加了 tmux 后,可以使用如下快捷键:
